Marketspread calendar is fully integrated into your overall operations workflow.
It will automatically track:
- Activated Events
- Registered Activities and Performers
Your calendar is also availalble to help you track anything else you would like, either as a private entry or a public entry. Some notable use cases would be:
- Event Staff Meetings
- Event Setup tracking
- Event Teardown tracking
- Event Staff Schedules
- Volunteer Schedules
- Other Public Activities
Basic Navigation
Your Marketspread Calendar can be accessed from your leftside toolbar.
Note: By default they following will automatically be added to your calendar:
- Activated Events
- Registered Activities and Performers
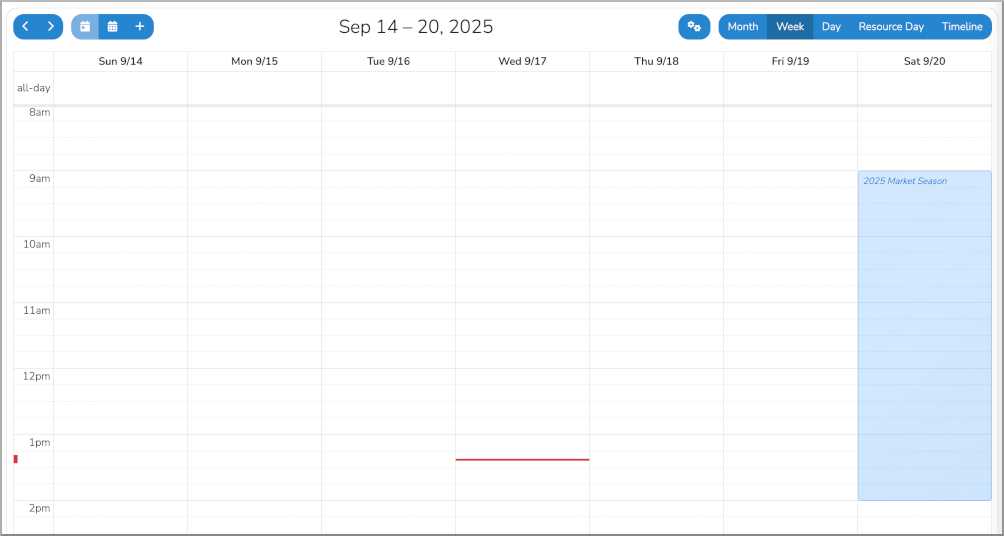
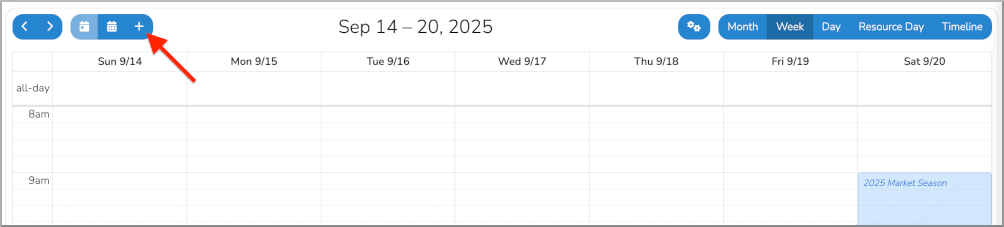
For example, below is a calendar for a Farmers Market, notice their weekly market (an activated event) is automatically showing on their calendar on Saturday 9/20.
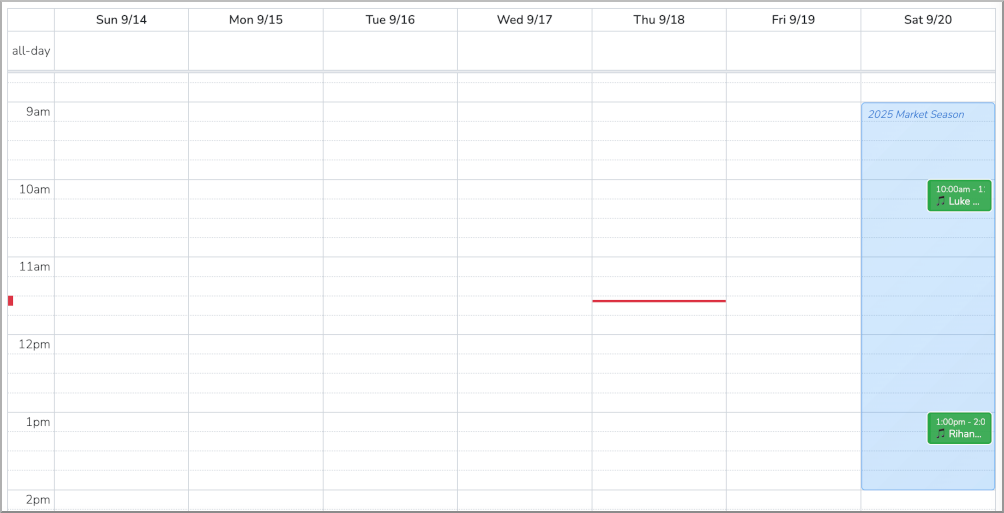
If we added some "Activities and Performers" against the event day they will automatically show on your calendar as well. Below is an example where we added two Performers.
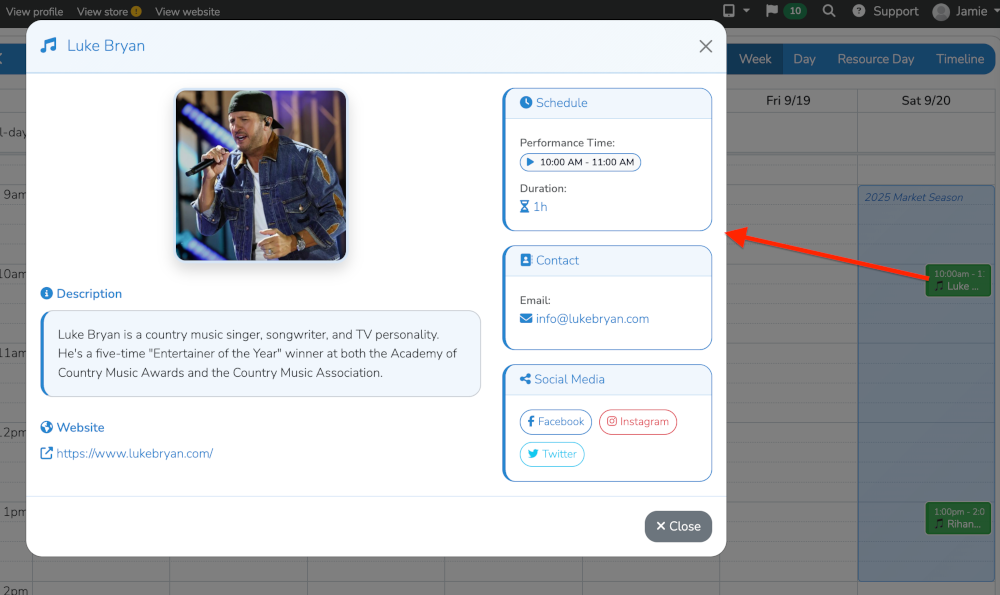
If you click on one of the "Activities and Performers" in calendar it will show you the details as shown below.
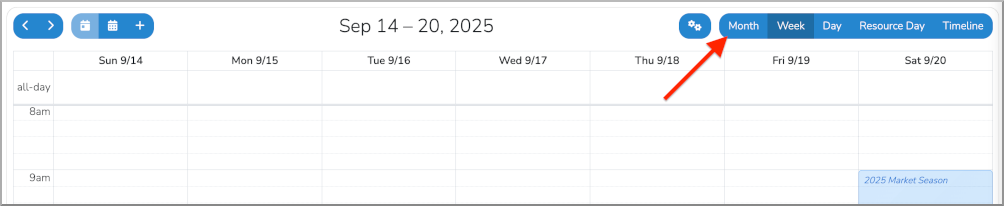
The default view is a Week View but you can easily switch to any of the other available views at the top right. Below is an example of switching to the Month View.
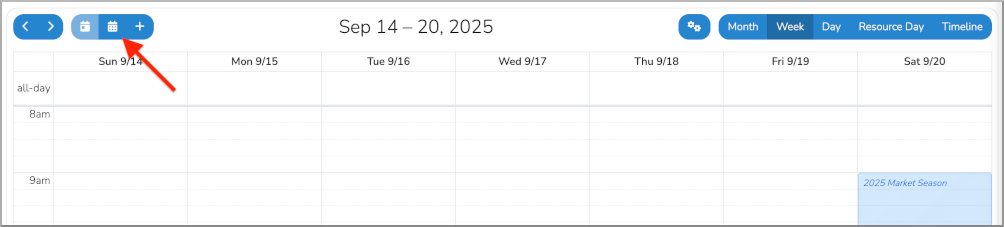
There is a Day Selector that you can display by clicking on the calendar icon at the top left as shown below.
The Day Selector will slide in from the left when selected. Clicking on any day in the Day Selector will take you to that day in the main calendar.
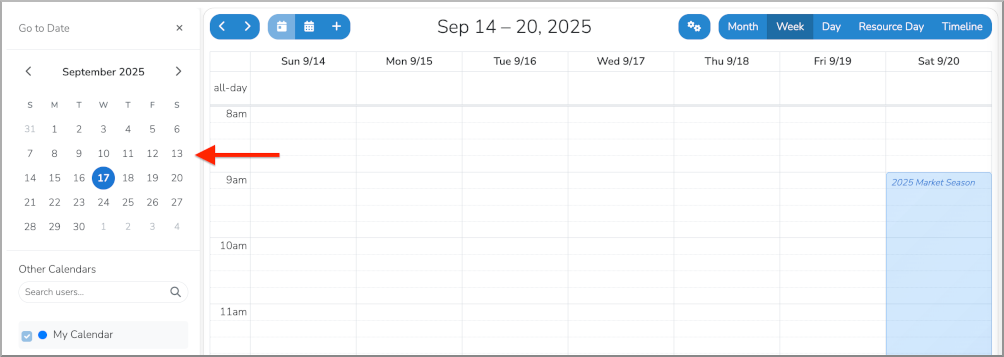
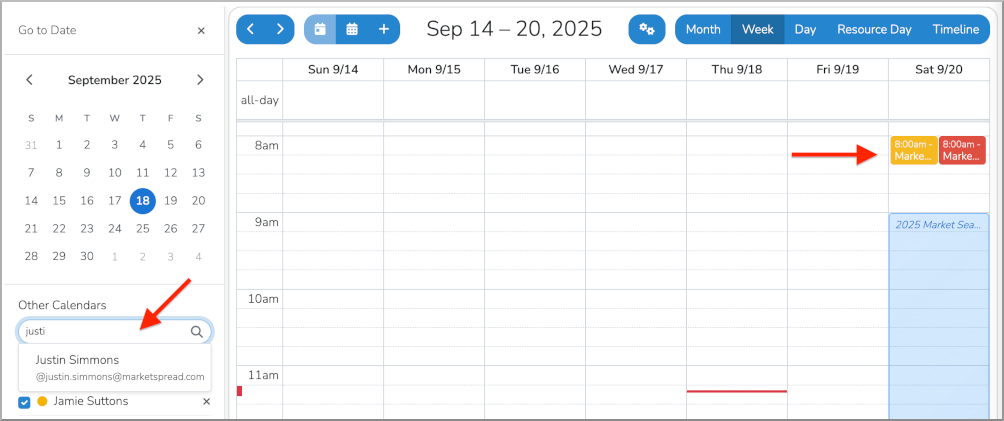
The Day Selector can also be used to select which other Employees calendars you want to include.
You can create a new Event or Task by highlighting a day and time range in the calendar itself of by selecting the "+" icon at the top left.
Creating A Calendar Entry
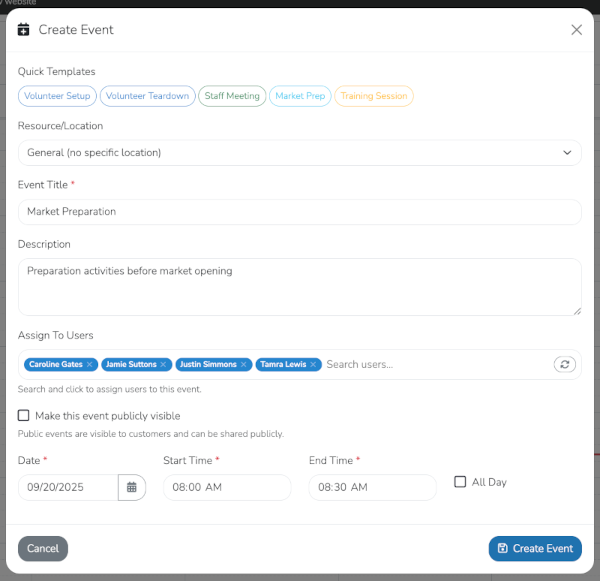
Creating a calendar entry can be done by either highlighting a time range in the calendar or via the blue plus button at the top left.
Below the calendar event creation form. Note the sections available to configure.
- Quick Templates - for common meeting types
- Resource Locations - for events that have individal rooms, buildings, etc..
- Event Title
- Description
- Assign to Users - to add users to a calendar entry
- Public Toggle - to specificy if entry should be public or private
- Date and Time Settings
After Creating the Event entry it will display on your main calendar. Below is the entry that was created from the example above.

Creating A Calendar Task
Just as you can create a calendar event entry you can also create a calendar task for yourself or any member of your extended team.
To create a task simply click on the blue "+" button at the top left.

Then select Create Task.
Below the calendar event creation form. Note the sections available to configure.
- Resource Location
- Task Title
- Description
- Assign to Users
- Date and Time

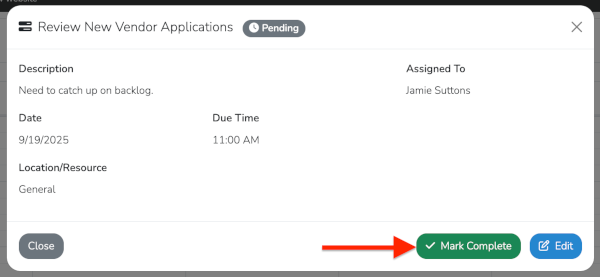
In the example above I am adding a task for myself to review our backlog of new applications. Once created it will show on my calendar as seen below.

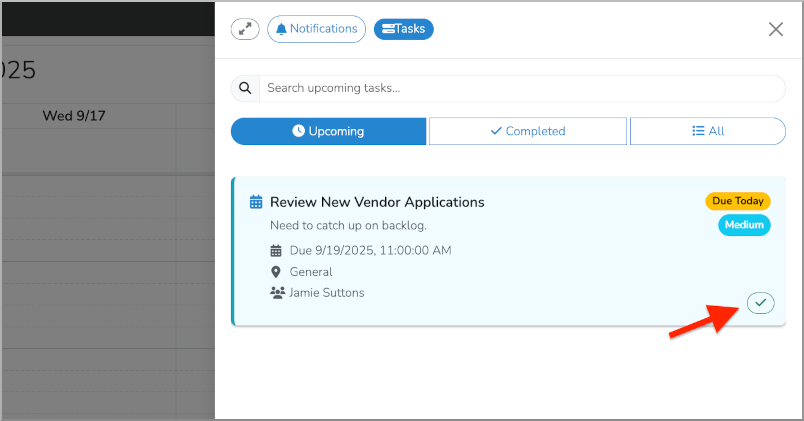
To market the Task complete you can simply click on it and select "Mark Complete".
Notifications Integration
Calendar Tasks are fully integrated into our Notifications system and can be viewed by clicking on the Notifications icon at the top right.

This will open your Notifications as shown below. You can also quick complete a Task from Notifications by clicking on the green checkbox button at the bottom.