Marketspread Forms provides the ability to collect highly structured data linked to vendors or event days. This provides users an almost limitless capability to track and store their own sets of market, event and/or vendor data.
Sample use cases could be:
Site Surveys - Have your onsite team collect and record a set of standardized event day data
Vendor Intake Forms - Have your team collect a set of structured data points while checking in vendors
Customer satisfaction Surveys - Collect customer satisfaction data during your event day
Each submitted form can linked-to and stored in either the vendor record or event day record and also available in bulk via a data report.
Note that this document is meant to give you a high level overview of Marketspread Forms. For a complete walkthrough please take a look at our video tutorial here: [COMING SOON]
Creating Forms
To start you will need to create a least one Form Templates. This can be done under Settings->Forms accessible from your side navbar. There you can create a new form by selecting the blue Create a form button.

This will open the form editor. Here you can set a form name, add a form logo, create questions and configure advanced form logic.
Setting The Form Use Category
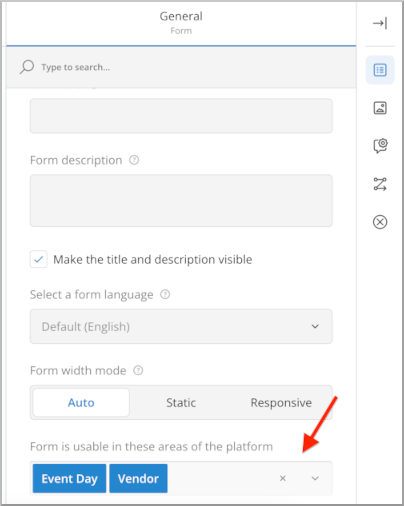
Forms can be availble to use in both vendor records and event day records (aligned to a vendor or an event day). In the form editor you have the ability to specify whether the form is available to be used for vendors, event days or both. The form use selector is available in the righthand settings for the general form (see example screenshot below). Just add Event Day, Vendor or both.
Saving The Form Editor
We recommend saving your form updates as you go and, of course, when your form is finished being edited. To save your form select the blue "disk" icon as shown below.

Exiting The Form Editor
To exit the form editor click on the top X button as shown below. Make sure to save your work first.

Publishing Forms
Once you have a form saved you will need to publish it in order for it to be useable. Below you can see an example of a market that has three template forms and two published forms.
Once a form is published you will have to edit the published version for the updates to be usable.

Using Forms
Depending on what use case category is configured for a published form you will be able to access them for use under a Vendor Record or an Event Day Record.
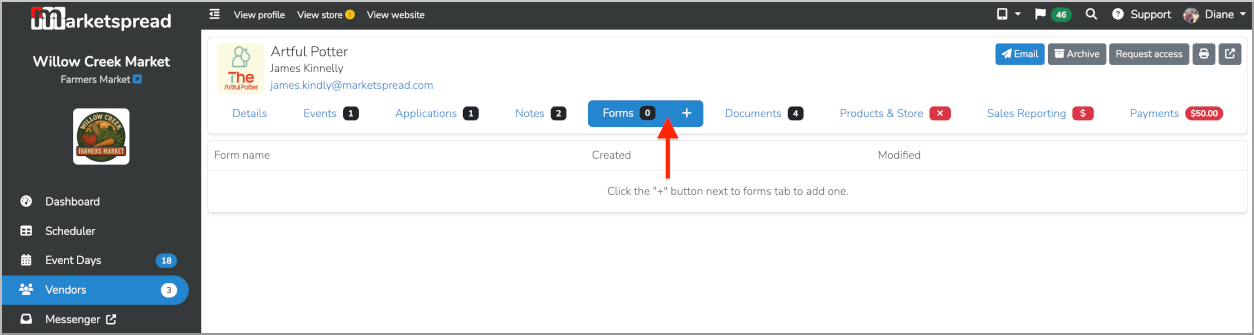
For a Vendor Record, Forms can be accessed by going into any vendor and selecting the "Forms" tab.
For an Event Day Record
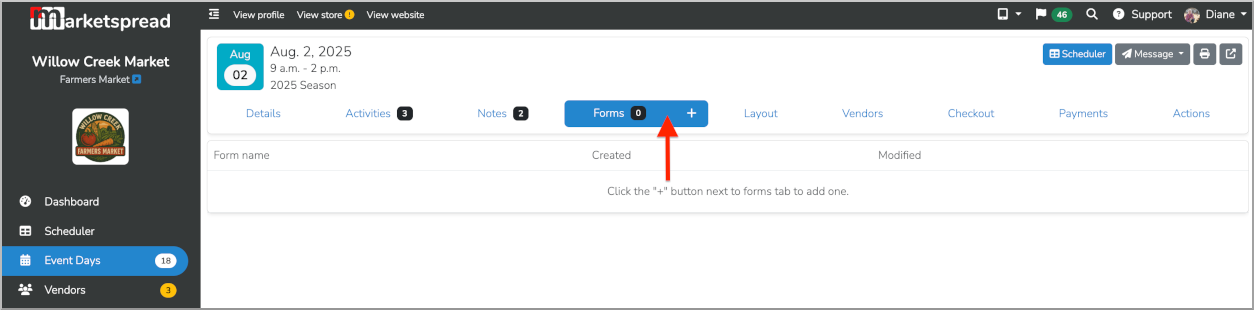
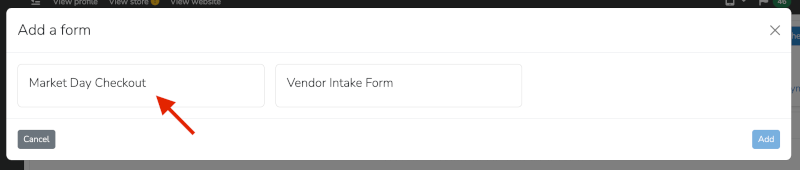
In either case, to complete a form simply click the "+" part of the tab. This will open a pop-up with all available (published) forms. To use the form just click on it in the pop-up.
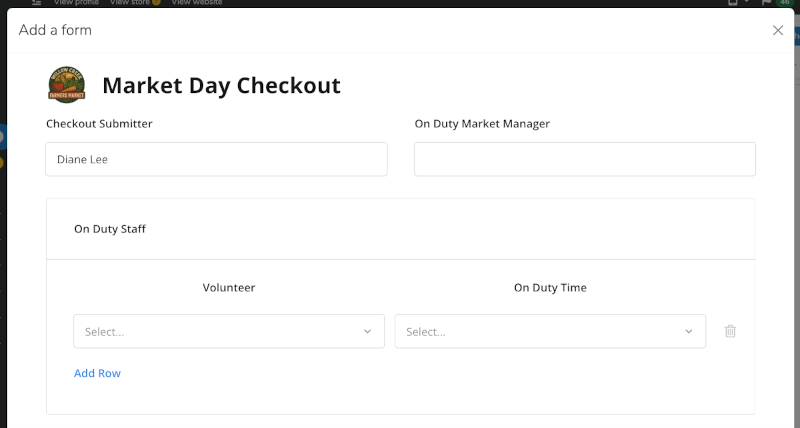
Then, simply fill the form in and submit it.
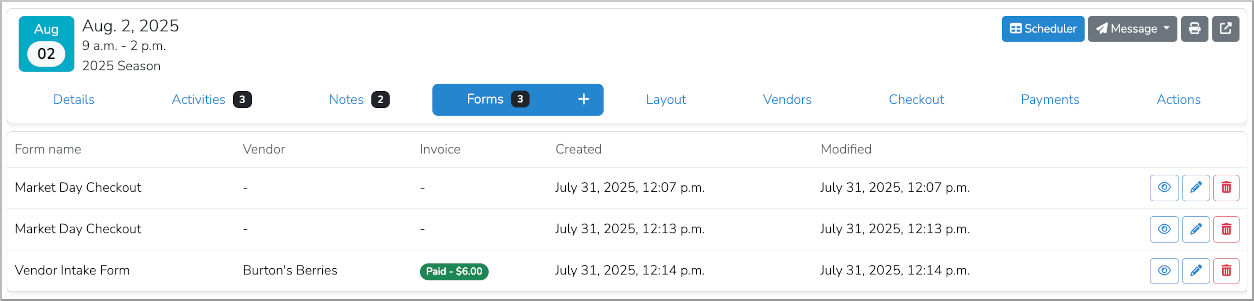
After the form is submitted that entry will show in a list under the Forms tab. Below you can see the entry we just filled in listed.

There is no limit on how many form submissions you have per day or per vendor. Below you can see we now have three for August 02, 2025.
Also, notice the new Inovice column? Yes, you can even autogenerate and take payment on invoices via form questions!
Viewing Form Data
Form data can be viewed at any time by simply clicking on the "eye" icon to the right of the form entry line item.

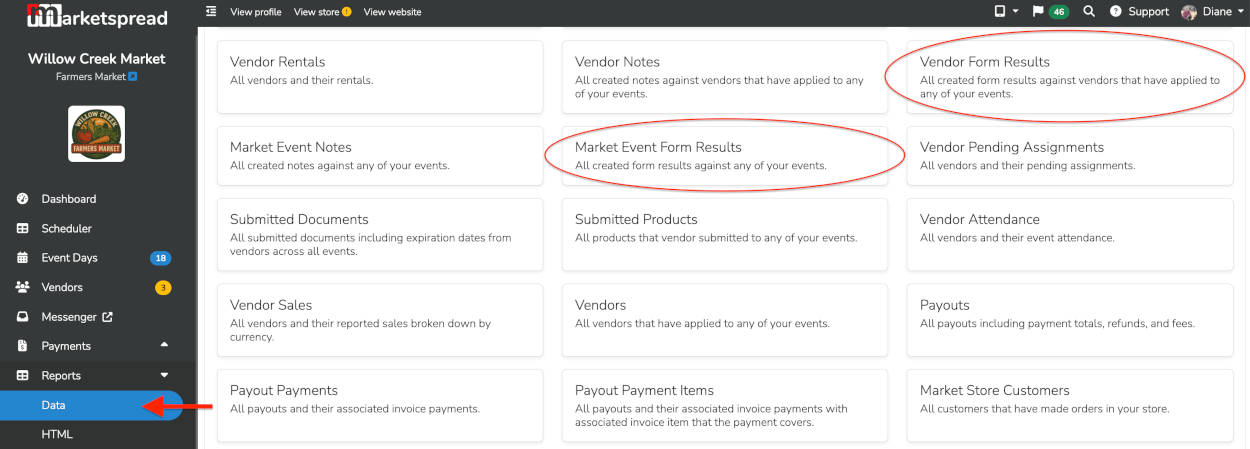
Reporting on Forms
Viewing form data in it's original format is great but sometimes you want to collect and utilized form data across multiple forms. For this we have two data reports called "Vendor Form Results" and "Market Event Form Results". With these reports you can use all the standard data reports filtering, sorting, groupings, etc... to get exactly the data view you want.